Val di Mello - Polimagò
We had been spending a great family vacation in Val di Mello with relaxed walking and playful bouldering, all framed by the impressive mountain scenery. It so happened that I met Nick, a guy from Pustertal who shared a common interest in getting a close-up of one of these tall walls. First we considered a link-up of Piedi di Piombo and Oceano Irrazionale, but after our inital enthusiams had cooled off in favor of a more rational analysis we opted for the shorter route Polimago which also promised a simpler approach and descent...
 |
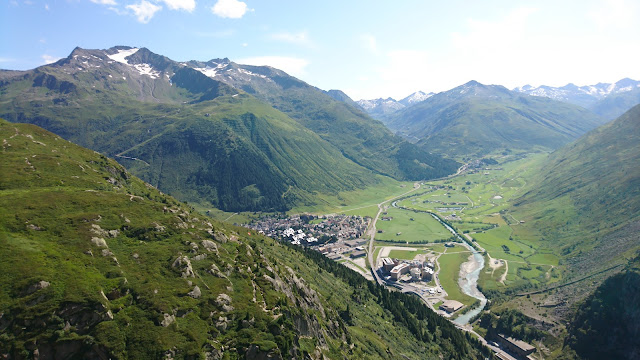
| View of Scoglio delle Metamorfosi during the desent |
Gear: 1x50m (2x50m to increase tactical options), cams 0-3, maybe +0.3-0.5, maybe nuts.
Approach: Depart from the hiking road at the Scoglio del Bùrgùn, an obvious boulder sitting in the river, shortly after Laghetto Qualido. Follow the visible trail and when in doubt, keep east. At some point you reach a large depression below a waterfall. To cross, ascend towards the waterfall, cross over the creek, and aim for the top corner on the opposite side. You should find some fixed ropes to negotiate a short slab. Without mistakes, it takes about 1:15 h from the camp ground to the start shared by Luna Nascente/Polimago.
L1 6b
The difficulties of this mini-pitch are concentrated in one burly, yet at the same time technical move. Pull once on slippery finger yams to get your feet up and you are basically done with the pitch. The belay consists of a bunch of slings around a flake.

L2 6a+
The guide promises pure Mello style, and this pitch certainly delivers some: while the initial stemming corner is fairly well protected, the remaining offwidth is mostly unprotectable. Make sure to use a long sling for the #3 friend after pulling around the flake at the beginning, otherwise rope drag will make the climbing later even more awkward. At two points you better part from the man-eating crack and reach for some decent holds on the left-hand arete. The belay is located maximally uncomfortably deep inside the crack.

L3 5b
The outlook on this pitch is quite daunting: the flake gets really thin and at the same time the separation from the wall increases to chimney width. Under these conditions, even the greatest layback enthusiasts will give the chimney a shot - and indeed, it works quite alright thanks to some decent foot holds that allow you to rest without constantly wedging yourself in. Moreover, there is even a piton half-way up the chimney to make matters a bit more relaxed. Finally, you exit on the thin flake and walk the edge a few meters to the belay. We recommend to sit on the edge, otherwise, it might become quite uncomfortable. Moreover, micro-sized cams come handy to improve the somewhat dubious belay. However, the cams sit behind the same shady flakes as the pitons...at least there are two independent flakes.

L4 6a+
Obligatory slab crux right after the shady belay, but hey, after all it's Mello, isn't it!? Well, not quite, you can place a decent #1 at your feet which causes quite some rope drag, but at least you reduce the risk of ripping off the belay should you slip. The slab crux is not particularly difficult, but given the circumstances that's exactly how you better feel about it...the next section features quite nice structure and two pitons, one which sits behind a hollow flake - to make things a bit more Mello I guess. Later micro-cams pay dividends, otherwise you might be able to resort to nuts, but it seems more difficult to place - one of mine got whipped out when I pulled up the rope at the belay. When you reach the corner facing east you can choose to belay from one piton (plus #0.4 and #0.3) at a surprisingly comfortable ledge - even though the actual belay is a bit higher up on a tree.

L5 5b+
If you belay at the tree, the downclimb is not even that straightforward, but once you reach the beautiful undercling sickle climbing becomes very enjoyable thanks to a very generous set of foot holds and nice undercling pockets. Around the corner a few easy layback moves get you to a small plateau where the belay is on two pitons and one bolt (yes, bolt). And yes, the two bolts within 2m above the belay are also part of the route, no matter how unmellodic it might seem.

L6 6a+
Well, the bolts are certainly justified, given the closed and blank corner that they protect. Intuitively, you might consider to avoid the blank corner after clipping the first bolt by taking a short slab traverse to the crack corner. Most likely, that was the original line, since the blank corner seems just too unlogical. In any case, the bolts lured me into the blank corner...grabbing the slopy arete while pressing my feet on some dimples I trembled my way up to the saving edge and grabbed it with great relief - just before my fingertips slipped off and I found myself dangling in the rope...I don't know if it was the dazzling heat or my own cold sweat or both, in any case it worked on the second attempt. But the pitch is far from over after this opening...it takes a few more friction moves on flakes to reach the corner, which is rather a long series of underclings with feet that are just not good enough to make you feel completely comfortable. Later, the inclination of the flakes turns the climbing into more moderate, vertical laybacking. A final slab crux guards the belay, and it is not entirely trivial, also depending on how much you accounted for rope drag earlier. In any case, this pitch takes a lot of cams in all sizes, it certainly makes sense to use them economically.


L7 5c
With the last independent pitch of Polimago you also reach the climax of this mellodrama: THE traverse on the artistic quartz veins. Just the distance looks disheartening, let alone the compact rock. In my opinion, the leader is more exposed since the slab crux is found literally on the last two of about 25 meters. Yet, it is astonishing that just at the point where the footholds vanish a few crimps pop up and enable passage. I recommend to skip the piton-belay and climb up another 10m of easy crack to a comfortable ledge and belay on 2x #0.5. This stance also puts the follower in a safer position.

L8 5a (Luna)
Finish the enjoyable crack.
L9 4b (Luna)
Easy traverse, linked the diagonal crack.
L10 5b (Luna)
The final friction test, not very difficult...if you manage to pause your counterfactual thinking for a moment.
Descent: Follow the visible trail north-east, climb a step (don't follow a visible branch to the east) to reach the plateau. From the plateau descend the visible path east, down the couloir. Along the trail you cross two small creeks (ca. 45min back to the start of Luna, then another 45min back to the valley).
Fazit
Polimago requires the full bag of classic tricks: corners, off-widths, chimneys, slabs. However, I thought it was not particulary heavy on cracks, but rather flakes. In any case, it puts the climber through a series of technical and mental tests, much more than Luna Nascente, which follows a quite continuous crack system.


Kommentare
Kommentar veröffentlichen